
Friday, December 26, 2014
Trying to catch up
Life has been so crazy busy since Halloween! I will be trying to catch up on posting some of the stuff I've been doing but some of the things I've done with the Cricut Explore have been flying out the door so fast that I didn't even take pictures! Here's an addition to the Thankful list I did for my grankids. Since I have a laser printer, I can't use printable magnet paper that I had in my stash so I did a print and cut of these two little figures from a teacher's website that offers free images. I then did a fast outline upload of the image, ran the magnet material through the Explore, then glued the printed and cut images on top of the cut magnet material and VIOLA!! Custom Magnet!! I originally got the images from a teacher's website for free clip art but now cannot find that link. However, the bear pilgrim and turkey are can be found at http://www.clipartbest.com/images-for-thanksgiving and the kids at the table at http://www.freeinternetpictures.com/wp-content/uploads/2014/11/First-Thanksgiving-Clipart.png
Thursday, October 30, 2014
Cherry Good Wishes Card got top 5 !!
Well, the Cherry Good Wishes card I posted for the challenge #231 at FCCB won top 5 !! WAHOO! Thank you to Custom Crops and the designer who did the cut file for this card. I only know her first name is Susan and since Custom Crops is out of business and their website is no longer functional, I cannot give her proper credit. Thanks FCCB !!
Great blog... Wine and Glue
I am a follower of a great blog at http://www.wineandglue.com/ and they always have these luscious recipes along with really neat decorating tips and crafting projects and some humorous and thought-provoking posts. This one I really did like and have printed it for my two youngest grankids. http://www.wineandglue.com/2014/10/thirty-days-thankful-printable.html I am so looking forward to their sharing each day of what they are thankful for. It really hit home with me because in a recent Bible Study (about the life of Moses), we discussed how the Israelites grumbled about their trials rather than celebrate in their freedom from the Egyptians and going to the Lord in prayer. I am thinking this might be a good thing for adults to do also!

Thursday, October 23, 2014
Haunted Cabin
I did this Haunted Cabin from the Haunted Forest kit by SVGcuts.com and I LOVE IT! I wasn't sure about my choice of papers but they ended up being musty and dark and spooky. I used the Print to Cut function on the Explore and the Happy Hauntings cartridge to do the bats (which are just glued to thin strips cut from the clamshell of a Cricut cartridge), the headless horseman, the owl in the tree, Frank and Mrs. Frank, the pumpkins on the porch and the mummy. The ghosts, raven on the roof and spider hanging from the side window are punches that a friend was working on while I was doing my house and she wanted me to use them. They fit in SO well!! I am thinking of doing one with a Christmas motif next.


Then tonight I put two small tealights in it to take "dark" pictures but while they worked great, I decided to put in a 6" battery operated pillar candle and it was FANTASTIC. And I noticed something....not sure it was intentional but the window above the peak of the front porch roof looks like a scary face staring back at you. HOW KOOL AND SPOOKY IS THAT????


Then tonight I put two small tealights in it to take "dark" pictures but while they worked great, I decided to put in a 6" battery operated pillar candle and it was FANTASTIC. And I noticed something....not sure it was intentional but the window above the peak of the front porch roof looks like a scary face staring back at you. HOW KOOL AND SPOOKY IS THAT????
Thursday, October 16, 2014
Birthday Card for Challenge
The Cherry Good Wishes card I did for the Fantabulous Cricut Challenge! WAHOO!! Thanks to the cut file from Custom Crops http://fantabulouscricut.blogspot.com/2014/10/wednesday-winners-challenge-231_15.html
Monday, October 13, 2014
Bus Box Card by Omar
I am constantly amazed at technology. The Cricut Explore has been so much fun and yet the technology continues to surprise and keep me jumping to learn all the ins and outs. Not only do I think the new Print to Cut technology is just beyond words, to sit and watch this machine draw and then cut is just a work of art. Omar at AwesomeSvgs.com has some incredible free creations on his website and one of my favorites is this bus box card. I sat in amazement and watched the kids on the bus be drawn and then cut and I just shake my head in wonder. Here's the link to his great card and below is the card I made using his wonderful file. The kids were colored with prismacolor pencils
http://awesomesvgs.blogspot.com/2014/08/school-bus-box-card.html


http://awesomesvgs.blogspot.com/2014/08/school-bus-box-card.html
Friday, October 10, 2014
Birthday Card for Challenge
The Fantabulous Cricut Challenge blog is having a challenge for birthday cards at http://fantabulouscricut.blogspot.com/2014/10/challenge-me-monday-challenge-231.html and this is my submission. So head on over to look at all the great entries and submit one yourself!
This card is a Design Studio cut file from Custom Crops and is by Susan. I have tried in numerous ways to find the link but Custom Crops is now out of business and must have closed out their website. They had a lot of GREAT cut files to use in the old Cricut Design Studio program and it's sad to think there's no way I can share a link and I do not have any authority to share the cut file. And yes, even though I have the fabulous Explore, I do still occasionally use an Expression and Design Studio, especially since I have so many great cut files there.
It uses Plantin Schoolbook and Lyrical Letters. It's numerous layers and pop dots for dimension with a white gel pen for the dots and I just loved the way it turned out. The cherries would really "pop" with some glossy accents over them. The cherry paper is old Stampin Up and the other papers were just from my stash.
Monday, August 25, 2014
Stamp A-Faire* 2014 Time Traveler - Afternoon Challenges
The 1920s......The afternoon challenges were fun and inspiring and frustrating and made me stretch! The first afternoon challenge was the 1920's and I LOVED learning to use the dies as templates to embellish with rhinestones and glitter. I will absolutely definitely do this in the future. It's a fun technique that can be sophisticated and whimsical and even applicable to holiday cards and scrapbook pages


The 1940's .... I LOVED this challenge also. The colors and stamps and flowers were just perfect. I had never used a stamp/stamps for backgrounds before and learned a lot doing this one. I need to work on my stem wrapping for the small bouquets but they are so versabile and would be useful for so many occasions!


The 1960's....I have to be honest and let you know that I struggled with this one. I did manage to do this card which I feel fits with the theme:

And lastly...the 1980's. I just enjoyed this theme so much!! It reminded me so much of my daughter and I know she will love this when I give it to her for her next birthday. She loved the rainbows and unicorns which were so popular during this era. I also wanted to do the folding technique but probably won't get to it before the deadline for the challenges.

The 1940's .... I LOVED this challenge also. The colors and stamps and flowers were just perfect. I had never used a stamp/stamps for backgrounds before and learned a lot doing this one. I need to work on my stem wrapping for the small bouquets but they are so versabile and would be useful for so many occasions!
The 1960's....I have to be honest and let you know that I struggled with this one. I did manage to do this card which I feel fits with the theme:
And lastly...the 1980's. I just enjoyed this theme so much!! It reminded me so much of my daughter and I know she will love this when I give it to her for her next birthday. She loved the rainbows and unicorns which were so popular during this era. I also wanted to do the folding technique but probably won't get to it before the deadline for the challenges.
Friday, August 22, 2014
Stamp A*faire 2014 - Time Traveler - Morning Challenges

Well, it's that time of year again, and Stamp A Faire starts tomorrow. I am at my sisters, awaiting two other friends and we are making a weekend of it. Can't wait for all the challenges to begin. I will be posting what I do and hope you'll join along !!
Morning Challenges:
7:am Morning Timer Challenge
Well, this challenge was to take a color scheme and a sketch and complete your card in 20 minutes. I failed. Took me 34. Had problems with my tape runner, couldn't decide on the sentiment, redid one flower. But I finished!! The sentiment is from the Regency Era stamp set, the flowers are from the filled with Joy Stamp Set, the papers are two Paper Trey papers. My fussy cutting is not that great but after staying up until almost 3am, laughing and giggling and looking at cards and stamp sets, my eyes just weren't focusing well this morning! And here are the results:

Ancient Rome Challenge--this challenge was to do a card using a mosaic pattern or one using embossing paste to simulate an old texture. I am planning on doing both but the first one I did was using the mosaic die that came in the SAF kit. I used the Paper Trey Ink stamp set entitled "Natural Beauties" because I love the way the two step die looks. I hope to be posting the embossing paste card...right now am waiting for the paste to dry so that I can stamp and watercolor the image on it.

This is the second challenge in this series--to use an embossing paste in your design to give it an aged look. I have never done anything like this before but used a pearelscent embossing paste, then stamped in momento black ink (should have used stazon) and then used a waterbrush pen and some ink spots (small ink pads). It kind of blurred and faded but gave it an aged look which I really liked. This card ended up being something I was not used to doing and stretched my limits so I enjoyed doing it. I will use this technique in the future.


I used the gold wax for this picture but it is definitely a technique I need to work on. The background paper was one of the small sheets of paper included with the kit

The Regency era challenge was for the approximate time of Jane Austen...an author, wit and talent that I absolutely adore. I combined both stamp sets for this challenge.

Tuesday, August 19, 2014
Camp Out challenge
It has been such a crazy busy summer...I haven't been able to craft much but hoping to get my room reorganized and straightened up so that I can start up again!
The Fantabulous Cricut blog http://fantabulouscricut.blogspot.com/2014/08/challenge-224-camp-out.html is having a camp out challenge and this will be my entry. It was cut using the Cricut Explore (what a fantastic machine!!) and the Smores box from the Camp Smores SVG kit from SVGcuts.com (http://svgcuts.com/index.php?main_page=product_info&cPath=16&products_id=315). It perfectly fits the graham crackers that are packaged in squares (the Honey Maid Fresh Stack Grahams that are square and not rectangle like most graham crackers). They are packaged with 8 squares per package and 6 packages per box. Each individual package is enough for 4 smores. I used the mini-Hershey bars layered on top of the graham crackers and put the four marshmallows in a Wilton Party Bag that I stapled closed to try to keep the marshmallows fresh. I inked the edges of all the cuts to give it some dimension. I could have even used the bigger marshmallows but didn't have any in the house. This is such a cute box and easy to put together.


The Fantabulous Cricut blog http://fantabulouscricut.blogspot.com/2014/08/challenge-224-camp-out.html is having a camp out challenge and this will be my entry. It was cut using the Cricut Explore (what a fantastic machine!!) and the Smores box from the Camp Smores SVG kit from SVGcuts.com (http://svgcuts.com/index.php?main_page=product_info&cPath=16&products_id=315). It perfectly fits the graham crackers that are packaged in squares (the Honey Maid Fresh Stack Grahams that are square and not rectangle like most graham crackers). They are packaged with 8 squares per package and 6 packages per box. Each individual package is enough for 4 smores. I used the mini-Hershey bars layered on top of the graham crackers and put the four marshmallows in a Wilton Party Bag that I stapled closed to try to keep the marshmallows fresh. I inked the edges of all the cuts to give it some dimension. I could have even used the bigger marshmallows but didn't have any in the house. This is such a cute box and easy to put together.
Tuesday, July 1, 2014
Mary's Cardz TV Challenge
Boy has this been a busy summer! I have been to Maine with my sister and now Hubby and I are getting ready to go on a motorcycle trip through the Dakota Badlands and several other small trips....just staying busy busy busy.
I am submitting this to Mary's 3-D card challenge-they are for a 4th of July party my son and his girlfriend are giving. These were done with the Cricut Explore and used two separate kits from SVG Cuts.com (Stars and Stripes and Made in the USA). I made a total of 10 large firecrackers, 15 small firecrackers (I just took the large firecracker svg file and collectively shrank them to a smaller size), only one USA (that S gave me fits!) and 15 of the star boxes. They are going to take a picture of the set up for these at their party but wanted to submit this now for the challenge.

I am submitting this to Mary's 3-D card challenge-they are for a 4th of July party my son and his girlfriend are giving. These were done with the Cricut Explore and used two separate kits from SVG Cuts.com (Stars and Stripes and Made in the USA). I made a total of 10 large firecrackers, 15 small firecrackers (I just took the large firecracker svg file and collectively shrank them to a smaller size), only one USA (that S gave me fits!) and 15 of the star boxes. They are going to take a picture of the set up for these at their party but wanted to submit this now for the challenge.
Wednesday, May 14, 2014
Lighthouse using SVGcuts.com file
I can't believe I forgot to post this great lighthouse. I used an svg file from SVGcuts.com and some scrapbook paper I had that had Maine written across it in different fonts. I gave this to my daughter for her birthday. She is finally getting to go to Maine with me this summer and I am so excited to be able to spend some time with her there. This lighthouse is really great in that it has a tea light at the top to make it really look light a light house and it comes apart toward the bottom. It makes a hollow shape and I put some "lobster" money in there for her.

Two camping cards using svg files from Miss Kate Cuttables
I did these two cards using svg files from Miss Kate's Cuttables. They were both scrapbook page titles and I just resized them for cards. I really liked how these turned out


Tuesday, May 6, 2014
Pool Table SVG
Wow, this has been a busy 5 months for birthdays, anniversaries and special events. Some friends we go motorcycle riding with recently bought a new house which has a great game room. They found a really neat pool table and had it recovered with felt in "electric blue" instead of the normal shade of green and it is so pretty! Stevie had a birthday when we were on our recent motorcycle trip to Galveston so I made this for him and filled it with chocolate candy. This SVG cut can be found at http://svgcuts.com/index.php?main_page=product_info&cPath=44&products_id=259 , What makes it really neat is that their pool table really looks like this one.


Travel Trailer SVG
I have been having so much using the Cricut Explore and SVG cuts that it's making me want to do more and more of them. This is a set from SVGcuts.com and can be found at http://svgcuts.com/index.php?main_page=product_info&cPath=32&products_id=357 . I did this one for my son's birthday and put candy in the bottom. I just loved the flamingos and the look of this cute vintage travel trailer.


Card of Encouragement
Here's a card I made for my daughter's coworker to give to her daughter. She is in the 2nd grade and trying out for cheerleader so I sent her this card of encouragement. I used Create A Friend for all the images except for Varsity Letter (for the "R" on her shirt. The paper was from an old 4 x 6 paper pad that was in my stash

Friday, April 25, 2014
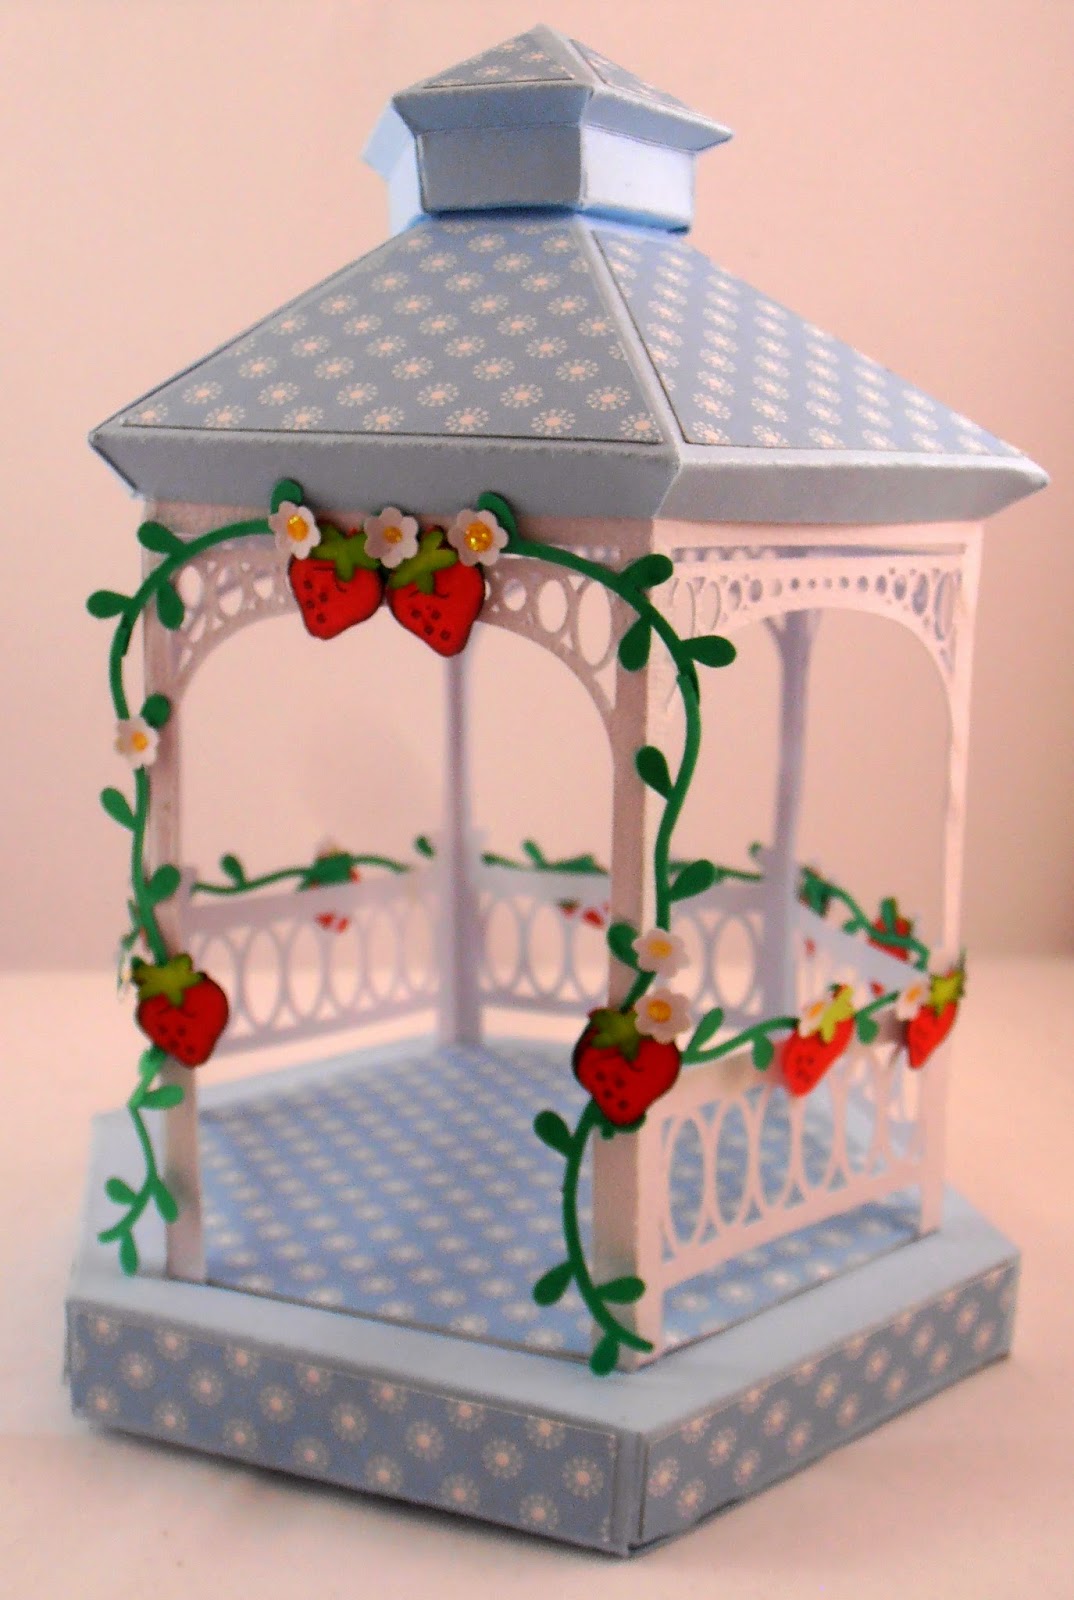
Strawberry Gazebo for Spring Project
I am entering this project in Cards TV Spring Challenge at http://cardztv.blogspot.com/2014/04/cardz-tv-card-challenge-6-spring.html. It is a fabulous free svg file from http://monicascreativeroom.se/category/cutting-files/3d-models/. I did need to resize as a group to get the gazebo to the size I wanted. I decided to dress up the gazebo so I used a vine from one of the Create a Critter cartridges and a strawberry from Paisley as it was simple and no shadow. I had to cut the strawberry at such a small size that it lost its definition and kind of faded up against the gazebo. So I did a copy and paste of the strawberry, changed one to write only, used a black American Crafts pen and placed it as closely on top of the cut one as I could manage. I can't remember if I welded or attached the two. The Edit feature wouldn't allow it to be an exact placement but it was close. And in this case, it didn't make a big difference since it was such a small image. The white flowers are from a hole punch I bought at WalMart absolute eons ago. Yellow stickles in the centers of the flowers makes them pop a little bit. Glued several of the vines together, placed the strawberries and flowers, wrapped around the gazebo and presto... I love using the Cricut Explore for my Cricut cartridges, SVGs and designs. Not only does it cut great, I love the writing feature!


Tuesday, April 22, 2014
Grandson's 7th Birthday Party
My grandson decided he wanted a karate party. The facility where he had the party sent out the invitations so I did the cupcake toppers and thank you cards for him. The cupcake toppers were cut with the Cricut Karate digital cartridge from cricut and they were a HUGE hit.


The background of the thank you card is from Edge to Edge. I did it in Design Space so that I could tweak the size to fit an A2 sized card. The main image is again from the Cricut Karate digital cartridge and I used action wobbles so that the image would really "kick".

The background of the thank you card is from Edge to Edge. I did it in Design Space so that I could tweak the size to fit an A2 sized card. The main image is again from the Cricut Karate digital cartridge and I used action wobbles so that the image would really "kick".
Monday, April 21, 2014
Lots of projects to post
I have been so slammed busy that I haven't been posting about any of the projects I've done so I'll be trying to catch up in the next few weeks.
These are cupcake toppers I did for my granddaughter's 5th birthday. I used Create A Friend for the tutu (I had to hand trim the waist for the tutu to fit right) and some glitter paper scraps I had left over from the castle I made her for her 3rd birthday party I cut the front of the tutu and then cut images on "flip" to hide the sticks that went into the cupcakes. I followed these instructions: http://www.thatcutelittlecake.com/2012/05/ballerina-party-tutu-cupcake-topper.html

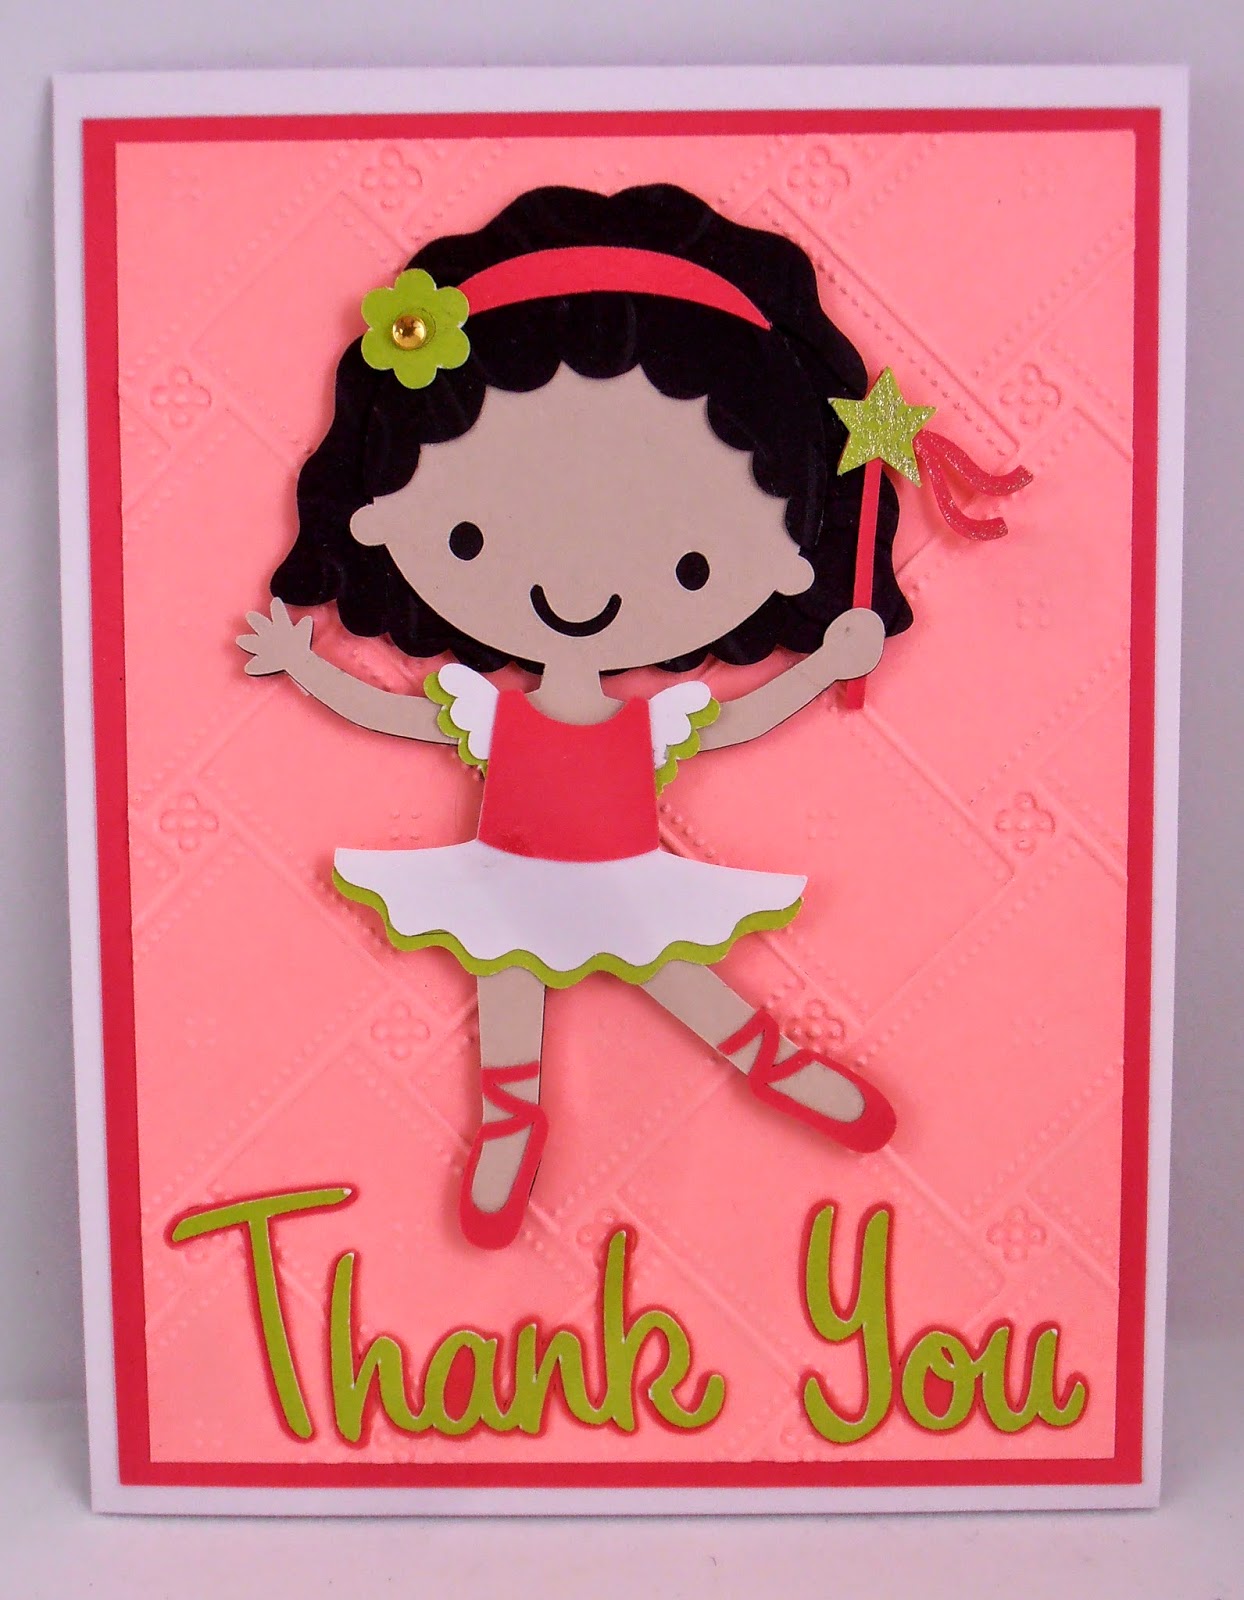
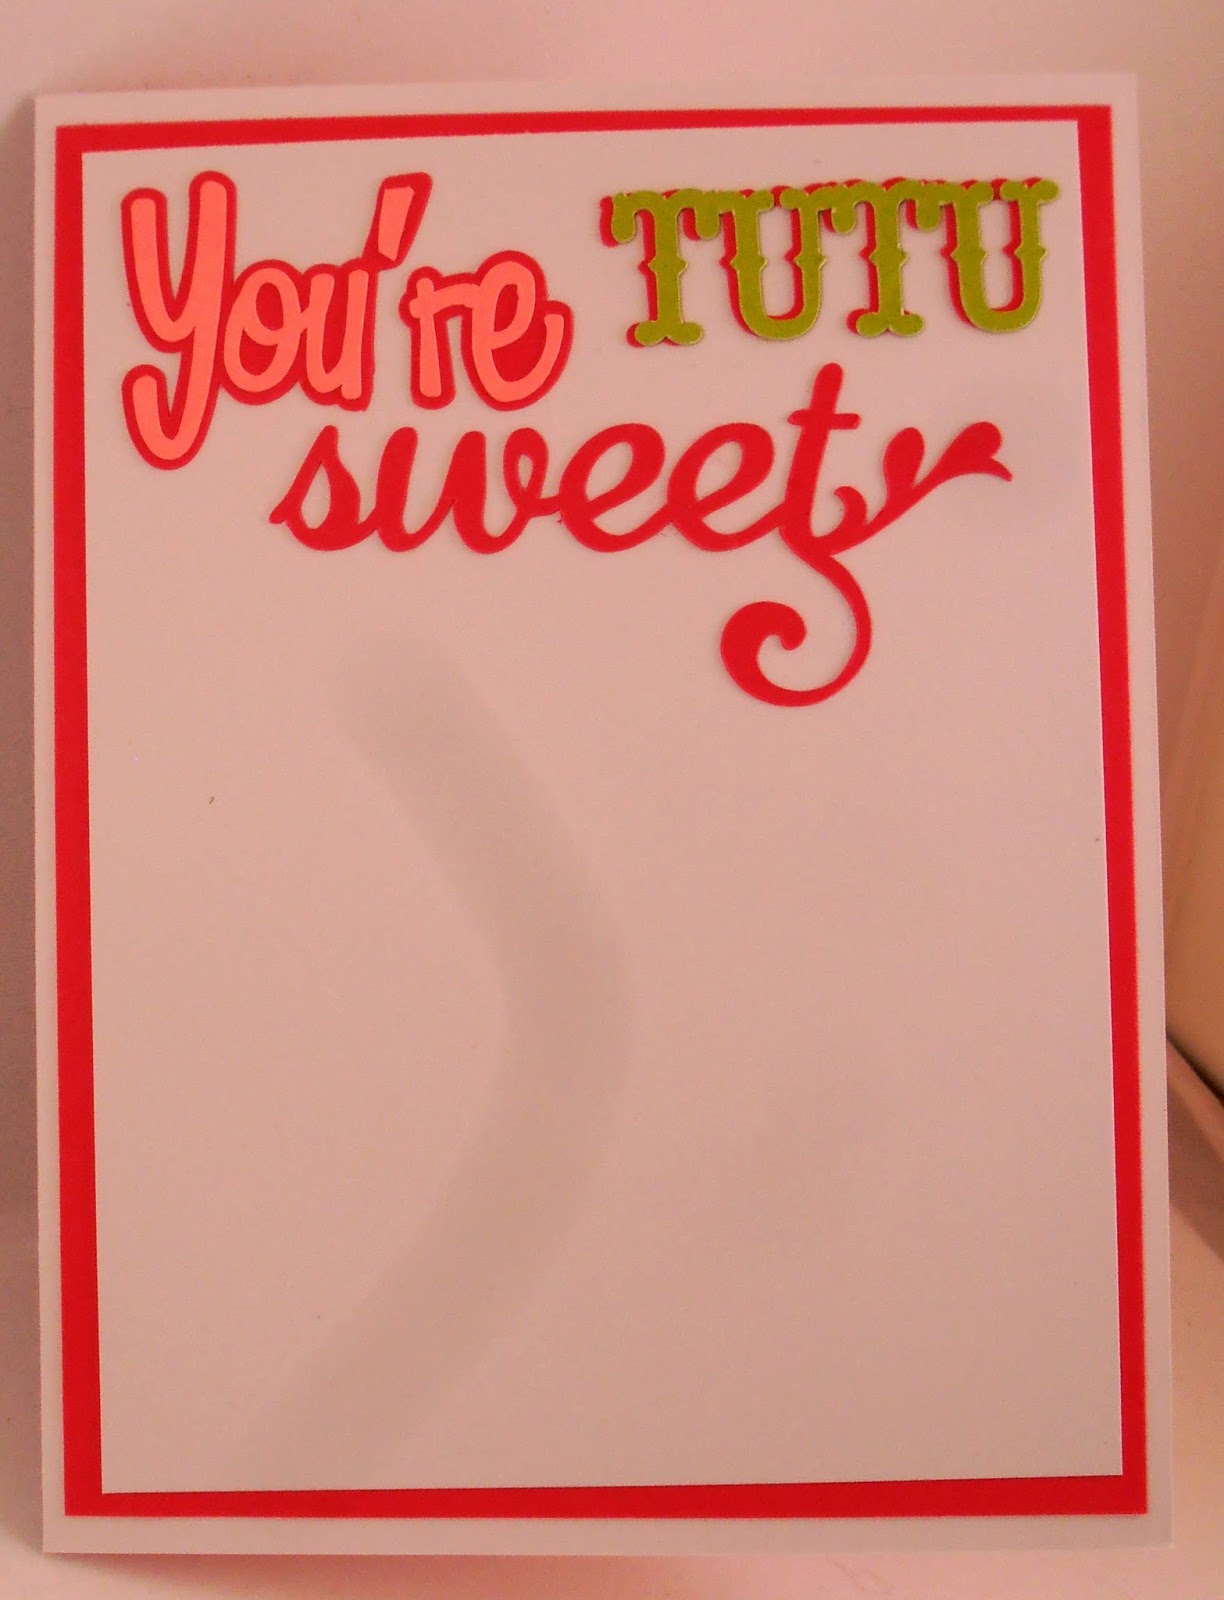
And here's the thank you cards I made for her to send out. The ballerina is again from Create A friend. I ran the hair through the Divine Swirls embossing folder, cut the tutu in white and green--cut the green one into three pieces and adhered to the back of the white one, moving the green pieces around so that they layered the sleeves and bottom of the tutu. I put her on action wobbles so that she would wiggle. I used different Cricut phrases for the outside and inside of the card. Please excuse the shadow across the inside of the card as my camera apparently has a scratch on the lens. Oh and this was my first project using the new Cricut Explore...man I love that machine!
These are cupcake toppers I did for my granddaughter's 5th birthday. I used Create A Friend for the tutu (I had to hand trim the waist for the tutu to fit right) and some glitter paper scraps I had left over from the castle I made her for her 3rd birthday party I cut the front of the tutu and then cut images on "flip" to hide the sticks that went into the cupcakes. I followed these instructions: http://www.thatcutelittlecake.com/2012/05/ballerina-party-tutu-cupcake-topper.html
And here's the thank you cards I made for her to send out. The ballerina is again from Create A friend. I ran the hair through the Divine Swirls embossing folder, cut the tutu in white and green--cut the green one into three pieces and adhered to the back of the white one, moving the green pieces around so that they layered the sleeves and bottom of the tutu. I put her on action wobbles so that she would wiggle. I used different Cricut phrases for the outside and inside of the card. Please excuse the shadow across the inside of the card as my camera apparently has a scratch on the lens. Oh and this was my first project using the new Cricut Explore...man I love that machine!
Subscribe to:
Posts (Atom)