
Monday, July 25, 2016
Stamp A Faire Challenge #7
This challenge was to use the theory of Pointillism, which I had never heard of. It's making a painting or scene using round images for the coloring. This takes some time, even with watercolors but the effect is different and stunning. On the first layer of coloring, I used the round eraser on the end of a pencil and for the smaller dots, I used small dots from two Paper Trey Ink stamp sets. I used this image of the violet and the great purple inks also from Paper Trey Ink to create this card, along with a die that punched the holes for the thread around the card. This is another one that I like so much I might not ever give it away.


Stamp A Faire Challenge #6
This challenge was to be inspired by Jason Pollock who used lots of splatters and splashes of paint. Now anybody who knows me understands that I struggle with painting outside the lines or doing abstract things. This technique was a lot of fun and one that I will most certainly do again. I loved making background paper that I not only liked but would use!


Stamp A Faire Challenge #5
Challenge #5 was masterpiece inspirations with the team where we were encouraged to look at one of the design team's takes on a masterpiece water color. I chose to again do one with flowers because I really, really want to get better at doing flowers in water color. Here's my card and it's another one I really liked.

Stamp A Faire Challenge #4
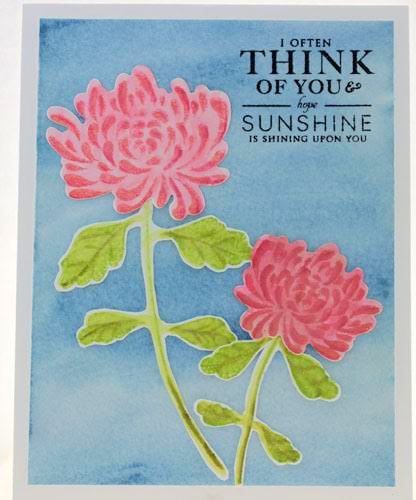
The fourth challenge was to do a card using flowers based on Monet's techniques and I tried to duplicate the example totally and ended up LOVING IT! The card itself was time consuming as we had to heat emboss twice in addition to water coloring the flowers, the vase, cutting out the flowers and assembling. I may have a hard time giving this card away.


Stamp A Faire Challenge #3
The third challenge was to make three note cards and three tags using gold, specifically liquid gold leaf paint or gold embossing. I did the note cards using the gold leaf paint on the initials and I must admit I struggled with the gold leaf paint. And then tragedy struck...I knocked over the entire vial and it went EVERYWHERE. We had to stop, my sister came running to my rescue and did the majority of the clean up. There was a little left in the vial but I decided to use gold embossing for the tags. I would have to practice with the liquid gold before I could every really be very good at it and I'm just afraid to go near a bottle of it again! The klutz in me can strike at any time! We were also supposed to do envelopes for the note cards but I never got around to doing that.


Stamp A Faire Challenge #2
This second challenge was to make a card thinking of Van Gogh's Starry Night...they taught us a great technique for using different colors of paint to make a night sky and stars. I ended up loving this card and will definitely try it again!


Paper Trey Ink Stamp A Faire 2016

Well here I am in beautiful Bar Harbor, Maine with my sister, and we are doing the Stamp A Faire challenges. The first challenge was to look at one of the old masters and use the color scheme to do your first card with watercoloring. This is the picture and color scheme I chose was Monet's Poppies. LOL. My card ended up being absolutely the polar opposite of the inspiration!
The inspiration:

My card:

Friday, January 29, 2016
What's wrong with me?
Oh my word! It's been a year since I last posted. This last year has been filled with challenges and changes and SO MANY projects and cards done with the Explore. Projects and cards that went out the door so fast I didn't even take pictures. So .... stay tuned while I catch up! In the meantime, here's one of the first t-shirts I did with HTV. I think this could easily become an addiction! The design is done with all Cricut images and was done by a member of a FaceBook group I'm on. I sure wish I could remember her name because I LOVE how this turned out. I made it for my hubby and he loves it, too!


Friday, January 2, 2015
How to cut out your photos and save ink in Design Space
There was a video recently done by the talented Melody Lane and it showed how to cut shapes out of your photos in Design Space. It was a brilliant idea and I kept thinking that surely there was a way to do this but print out only the shape you want cut in order to save ink. After lots of trial and error, I FOUND IT! It does take quite a few steps so some may not want to bother with the extra steps but I am on a self-imposed crafting budget and this will help save on toner on my laser printer. Please be patient with my explanations as I am definitely no teacher but here goes:
Upload your picture using the basic upload feature of DS. Select a shape from the cartridge library that will fit just a bit over your picture and in the layers panel make the color of it white. I used a rectangle-the first one that showed up in images that I had. Select a shape from the cartridge library that you want cut out of the photo and in the layers panel make it white. I used a heart from Seasonal Soirees. Place your image to be sliced (heart) on top of the basic shape (rectangle) Slice your image (heart) from the basic shape (rectangle) and move the heart to the side. Position the basic shape (rectangle) over the picture so that the cut out shape is where you want it on the photo (your white basic shape needs to be on top). Be sure that your basic shape covers the entire photo --I did that before I sliced the heart out. Using your mouse, drag the blue box around the picture with the sliced white rectangle on top and click attach. Take your sliced image (heart) and using the corner dots resize it just a fraction smaller--I had to do this because I had difficulty getting it EXACTLY in the same spot it was sliced from. It's strange to note that even though I used the corner resizing dot, the heart did not resize uniformly but it wasn't off enough to bother me. Make sure the sliced image (heart) is on the scissors in the layers panel. Then, for now, click the eye on the sliced image (heart) to hide it. At this point there were times when my layers panel showed it had two photos (same pic) to print but ignore that...only one will print)
Click the "GO" spot at the top and print the image (which will be the picture with the basic shape on top--the white rectangle which will show as print in the layers panel). The photo image will have the sliced image (white heart) cut out. In other words all that will print is your cut out image (the heart).

After it prints, you will then be on the Cut Preview Screen. X out of that and you will be back at the main cut screen. Click the "eye" on the sliced image (white heart) and it will appear. Bring it to the front of the images using the "arrange" icon at the top and position it in the spot where it was cut from. You should see a white rectangle, a sliver of the printed image and the white heart. Using your mouse, draw the blue box around the images and click attach. At this point, click on the eye of the photo in the layers panel to hide it (saves on processing time). In the layers panel BE SURE THE HEART IS ON THE SCISSORS NOT THE PRINT ( think it automatically reverts back to print during the attach process). You will then see a white rectangle (print) a sliver of background mat and the white heart with a black outline (meaning cut). Click the green go button. On the Mat Preview page, click on the print and continue.

When your printer pulls up the page, click "Cancel" instead of print (my printer screen showed a blank..strange).

You will then be on the cut preview screen (only the heart with black outline and the rectangle will show).

Place your previously printed heart picture on your mat and load it into the machine. Hit the cut button on the Explore. First the heart will cut and then the rectangle. There may be a way to not cut the rectangle but honestly at this point I couldn't figure out how and I was happy with the process as
is. It's just a little bit of paper waste but I recycle all my trash paper. Once during this experiment, it did a double cut on the heart. Not sure how I did that but it worked and I was happy.
So...to make a very long story short...it can be done. Just takes some time so everybody needs to decide what's most valuable to them...time or ink/toner. Once I do this process a few more times, I'll probably like it more and more. I did get a lot of shockwave/plug in errors which I just "x" out of and eventually the screens move. I think it's because of the limitations of my laptop.
Upload your picture using the basic upload feature of DS. Select a shape from the cartridge library that will fit just a bit over your picture and in the layers panel make the color of it white. I used a rectangle-the first one that showed up in images that I had. Select a shape from the cartridge library that you want cut out of the photo and in the layers panel make it white. I used a heart from Seasonal Soirees. Place your image to be sliced (heart) on top of the basic shape (rectangle) Slice your image (heart) from the basic shape (rectangle) and move the heart to the side. Position the basic shape (rectangle) over the picture so that the cut out shape is where you want it on the photo (your white basic shape needs to be on top). Be sure that your basic shape covers the entire photo --I did that before I sliced the heart out. Using your mouse, drag the blue box around the picture with the sliced white rectangle on top and click attach. Take your sliced image (heart) and using the corner dots resize it just a fraction smaller--I had to do this because I had difficulty getting it EXACTLY in the same spot it was sliced from. It's strange to note that even though I used the corner resizing dot, the heart did not resize uniformly but it wasn't off enough to bother me. Make sure the sliced image (heart) is on the scissors in the layers panel. Then, for now, click the eye on the sliced image (heart) to hide it. At this point there were times when my layers panel showed it had two photos (same pic) to print but ignore that...only one will print)
Click the "GO" spot at the top and print the image (which will be the picture with the basic shape on top--the white rectangle which will show as print in the layers panel). The photo image will have the sliced image (white heart) cut out. In other words all that will print is your cut out image (the heart).
After it prints, you will then be on the Cut Preview Screen. X out of that and you will be back at the main cut screen. Click the "eye" on the sliced image (white heart) and it will appear. Bring it to the front of the images using the "arrange" icon at the top and position it in the spot where it was cut from. You should see a white rectangle, a sliver of the printed image and the white heart. Using your mouse, draw the blue box around the images and click attach. At this point, click on the eye of the photo in the layers panel to hide it (saves on processing time). In the layers panel BE SURE THE HEART IS ON THE SCISSORS NOT THE PRINT ( think it automatically reverts back to print during the attach process). You will then see a white rectangle (print) a sliver of background mat and the white heart with a black outline (meaning cut). Click the green go button. On the Mat Preview page, click on the print and continue.
When your printer pulls up the page, click "Cancel" instead of print (my printer screen showed a blank..strange).
You will then be on the cut preview screen (only the heart with black outline and the rectangle will show).
Place your previously printed heart picture on your mat and load it into the machine. Hit the cut button on the Explore. First the heart will cut and then the rectangle. There may be a way to not cut the rectangle but honestly at this point I couldn't figure out how and I was happy with the process as
is. It's just a little bit of paper waste but I recycle all my trash paper. Once during this experiment, it did a double cut on the heart. Not sure how I did that but it worked and I was happy.
So...to make a very long story short...it can be done. Just takes some time so everybody needs to decide what's most valuable to them...time or ink/toner. Once I do this process a few more times, I'll probably like it more and more. I did get a lot of shockwave/plug in errors which I just "x" out of and eventually the screens move. I think it's because of the limitations of my laptop.
Friday, December 26, 2014
Trying to catch up
Life has been so crazy busy since Halloween! I will be trying to catch up on posting some of the stuff I've been doing but some of the things I've done with the Cricut Explore have been flying out the door so fast that I didn't even take pictures! Here's an addition to the Thankful list I did for my grankids. Since I have a laser printer, I can't use printable magnet paper that I had in my stash so I did a print and cut of these two little figures from a teacher's website that offers free images. I then did a fast outline upload of the image, ran the magnet material through the Explore, then glued the printed and cut images on top of the cut magnet material and VIOLA!! Custom Magnet!! I originally got the images from a teacher's website for free clip art but now cannot find that link. However, the bear pilgrim and turkey are can be found at http://www.clipartbest.com/images-for-thanksgiving and the kids at the table at http://www.freeinternetpictures.com/wp-content/uploads/2014/11/First-Thanksgiving-Clipart.png

Subscribe to:
Posts (Atom)